|
Projects Previous Projects have been moved to www.eastcreekprecision.info Feel free to review them at your leisure. Installing and headspacing a new barrel on a bolt action receiver.  First,
make a mandrel to hold the stripped receiver in the lathe and mill chucks.
This started out as a 14" piece of cold rolled 1.25" diameter
steel rod. The long section of rod
should be turned to just be a slip fit through the receiver bridge. The short section should be turned to just
under the minor thread diameter of the receiver threads. The lengths of the short and long sections
are up to you, but should extend far enough from the receiver that it will turn
on the lathe without hanging up in the vise jaws and with enough room to use a
cutting tool. Both ends of the mandrel
should be center drilled and tapered for live centers. 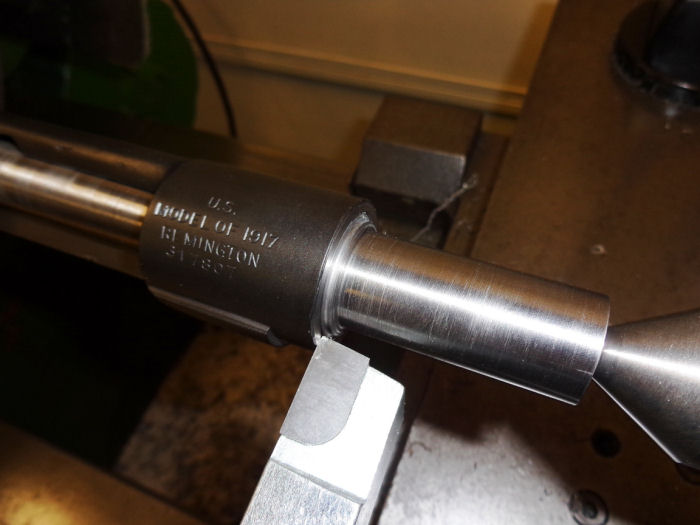 Mount
the receiver on the mandrel, chucked it up in the lathe, and trued the face of
the receiver. Take off only the bare
minimum of metal needed to true the face.  The
finished product. The receiver will be re-mounted on the mandrel later
and set up in a vertical rotary table on the mill so the rear sight ears can be
removed while leaving an exact circular shape for the receiver bridge.  The
new barrel turned on to the receiver and properly indexed (viewed from below). If there are no index marks follow best practices
for torque. If the face of the barrel
shoulder is suspect or damaged, the barrel can be chucked up in the lathe and
trued in similar fashion to the receiver face. 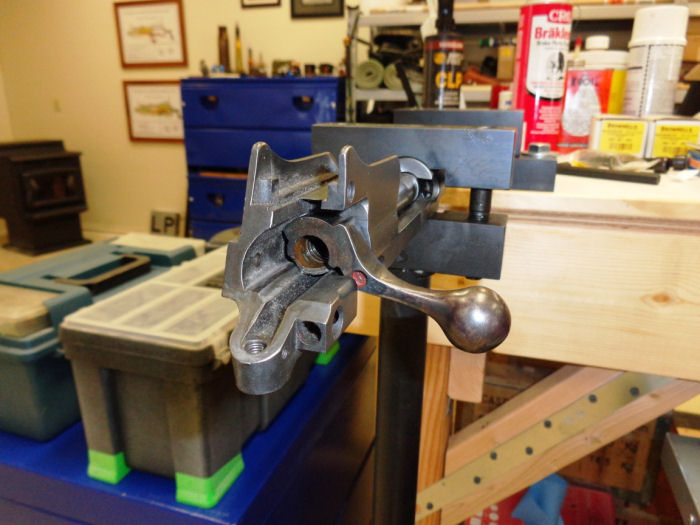 Checking
headspace. "No go" gauge doesn't allow bolt body to close,
which is good, but it looks like we may have a short chamber since the bolt
usually closes about ten more degrees on the no go. Be certain that the bolt body is completely
stripped of extractors, internal ejectors, firing pin, etc. Using a bolt that is not stripped can give
false readings that can leave you with a chamber that is much too long.  Suspicions
confirmed. The "go" gauge doesn't allow the bolt body to fully
close either - short chamber. 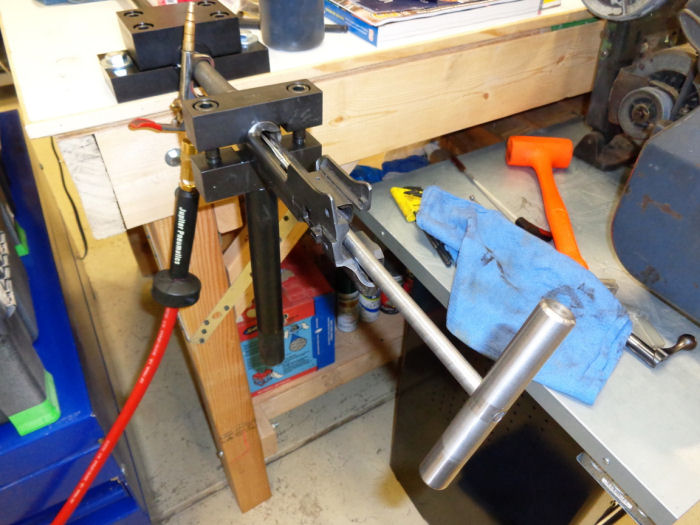 Finish
reamer set up on a t-handle to extend the short chamber about 0.002". This can be done either horizontally or
vertically. Either way, wrap a paper
towel or rag into a “bag” at the muzzle of the barrel and tape it into place. Dip the entire reamer into cutting oil,
squirt cutting oil into the chamber, carefully insert the reamer and take a few
light turns, then carefully remove the reamer.
Do not turn it backwards (“backwards” is generally counter clockwise as
viewed from the handle) and do not get excited about cutting lots of
metal. Fingertip pressure is about
right. After the reamer is removed,
clean it with compressed air and shoot air down the barrel from the camber end
to clear chips and old oil. The “bag” at
the muzzle will catch the chips and oil and prevent them from splattering all
over your shop. Now, check the headspace
again. 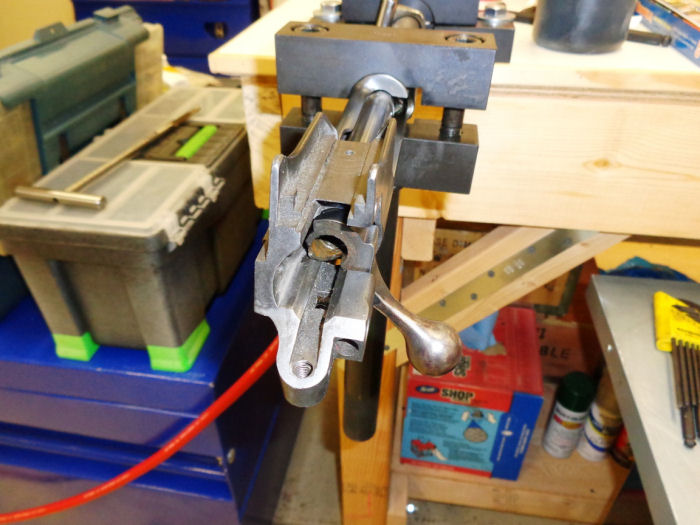 Success!
Bolt closes on "go" gauge with just the slightest bit of
resistance. That means a good, tight chamber. “No go” gauge did not allow the bolt to
close. 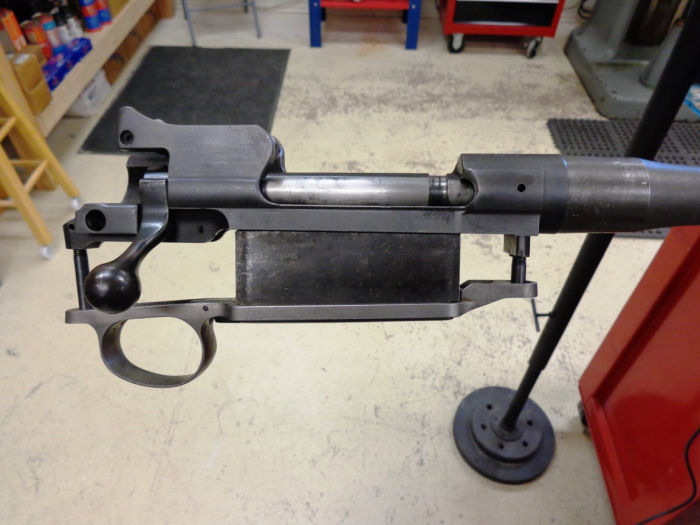 Headspaced
bolt and US Model 1917 receiver set up with USGI magazine box and floorplate. 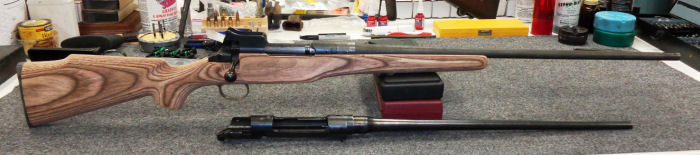 Temporarily
set up in unfinished stock Next month we will take it all apart and start
milling the rear sight base and protective ears from the receiver bridge.
The plan is to slightly re-contour the barrel to remove some dings and
provide a "step" between the face of the receiver and the shoulder of
the barrel. Also going to cut the barrel back just enough to add a Shrewd
brand muzzle brake while removing the keyway for the front sight and not disturbing
the barrel manufacturer engraving. The exterior of the brake will be
tapered to match the barrel contour.
Then we add scope bases and rings, jewel the bolt, rust blue the barrel
and receiver, inlet and bed the barreled action into the stock, finish the
stock, mount and bore sight the scope, then zero it at the range. Stay
tuned!
|
|
